Programming an Rfduino with an FTDI friend
There comes a time in every man’s life when he buys a thing, thinking he won’t need accessories, only to find out later that he does, in fact, need them. This was one of those times.
I’d tweeted about building a bluetooth-enabled watch,and a friend linked me to the RFduino, a device that seemed to fit all my requirements. It’s small, low power, has enough GPIOs, and was supposedly open source. I’m not entrely sure that’s true, as I know that you need a proprietary toolchain to build the bootloader currently, but the bootloader itself is at least open. So, I decided to forge ahead with experiments anyway. I ordered two of the SMT versions.
When they arrived, I was stoked. They’re freaking tiny . My level of stoke only lasted until I started trying to find out how to program it; there wasn’t much information at first, other than to use their programmer. A look at the data sheet told me that it was just a USB → serial interface, and I had one of those, Adafruit’s FTDI Friend.
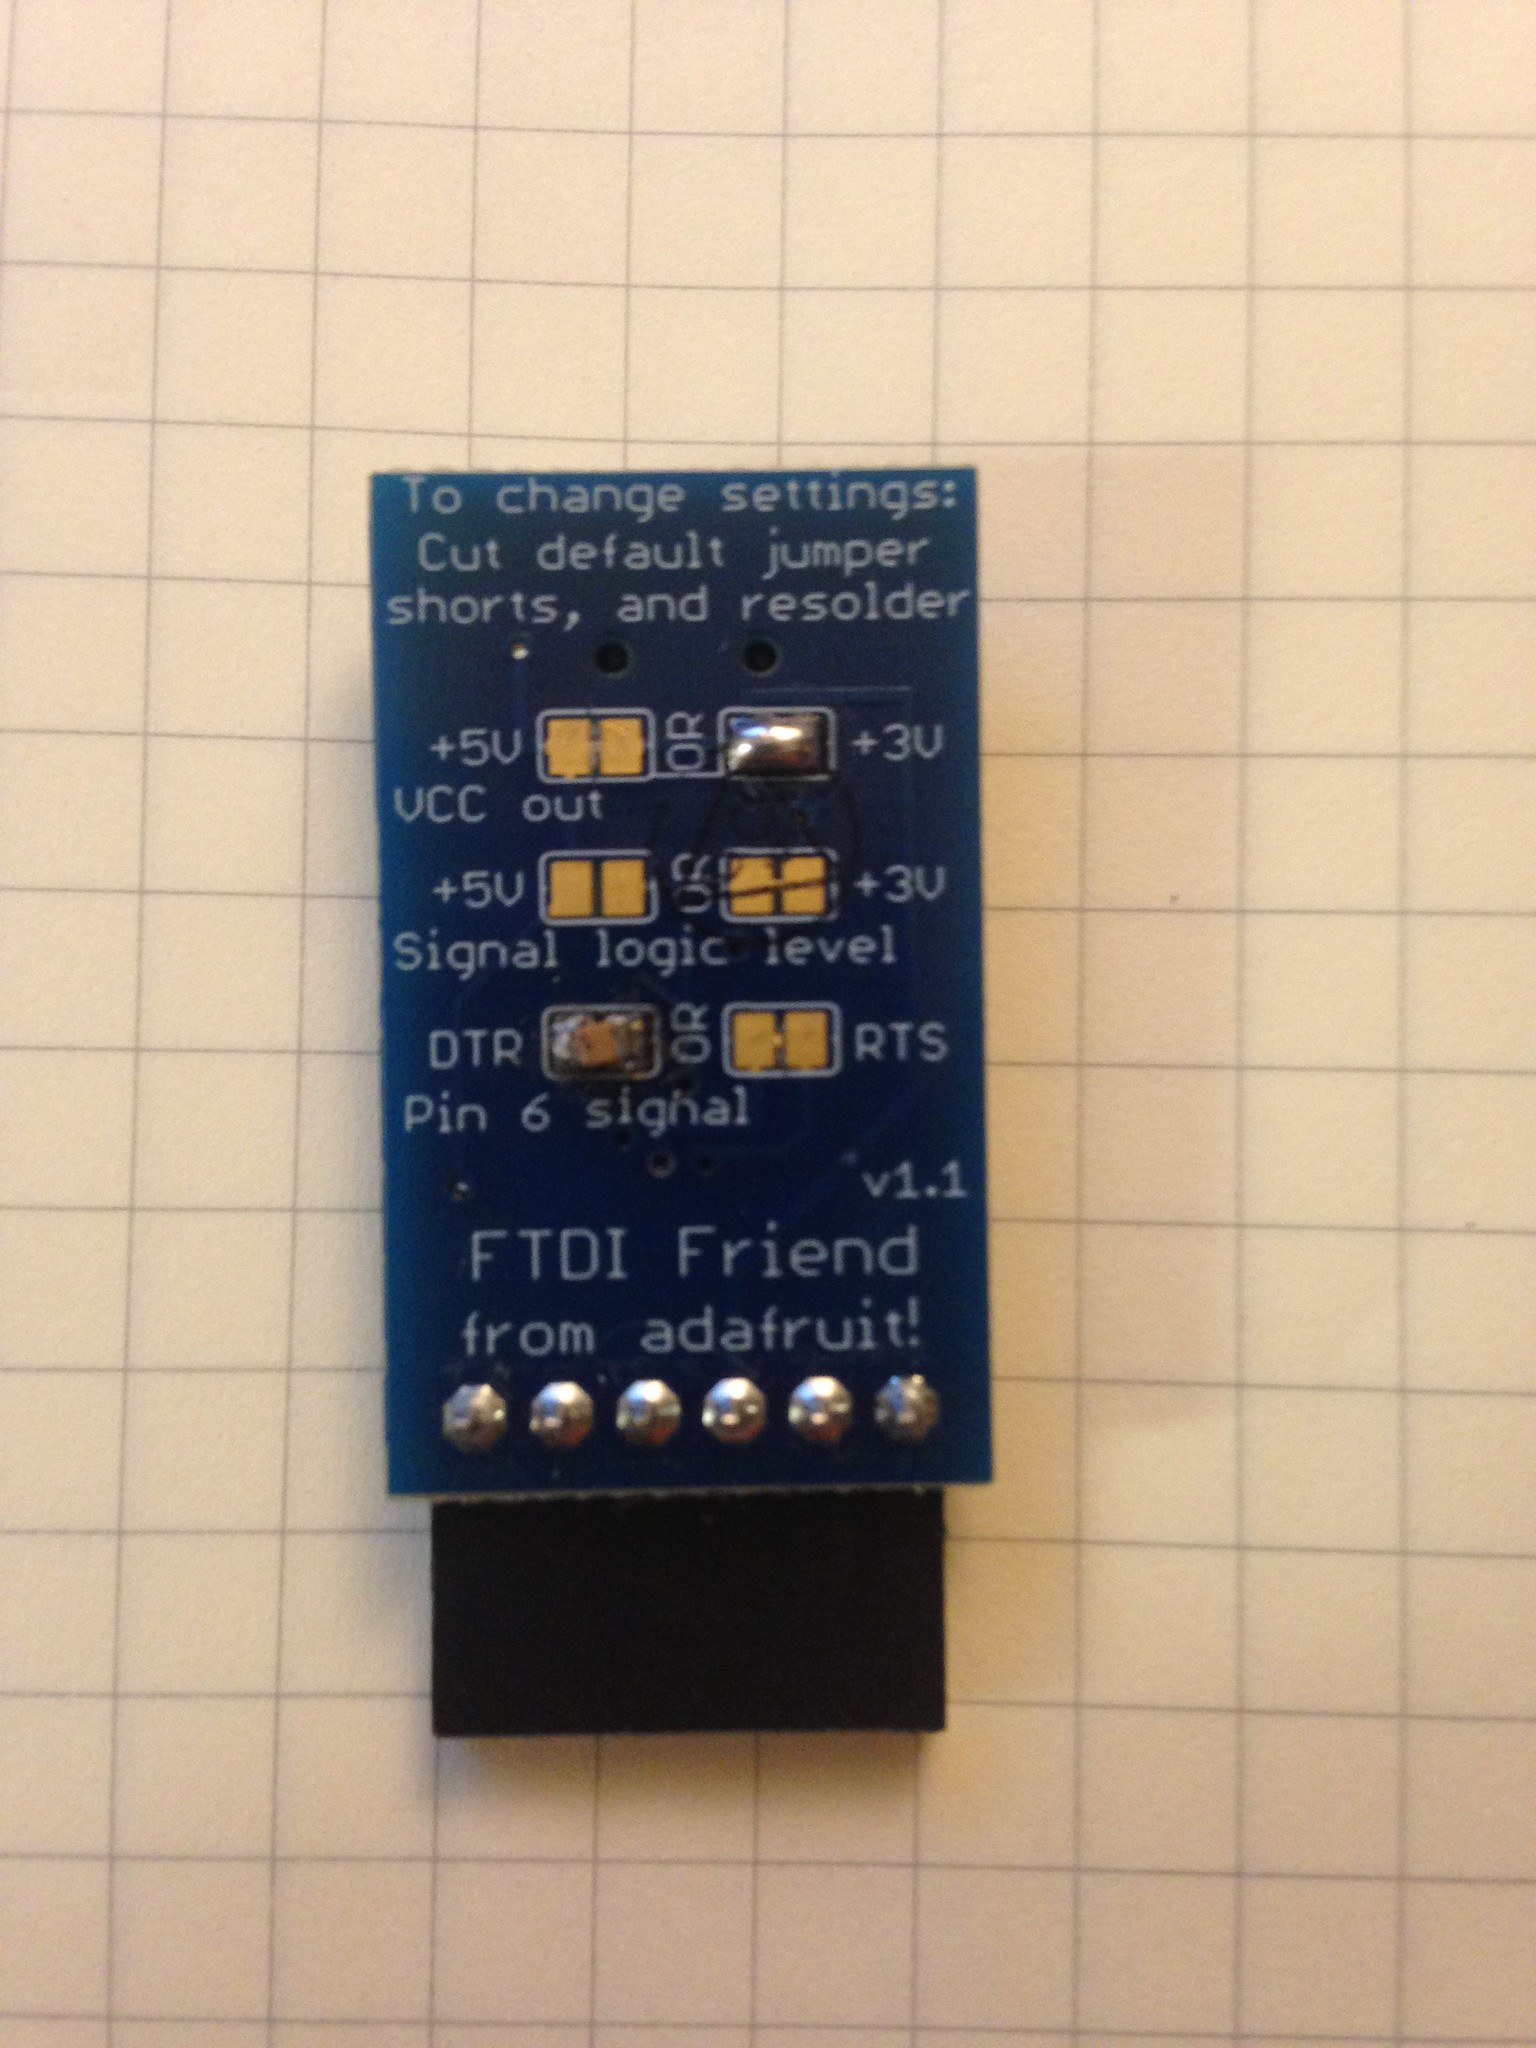
To get it working, there are some steps. The Friend is already configured for 3v logic, but you have to solder some jumpers on the back to expose the right signal lines, and make Vcc 3v as well. In the picture, you can see I’ve bridged the DTR jumper pads with a surface mount part; that’s a small value capacitor I had laying around. You don’t have to do it that way, it just needs to be in series with the DTR line.
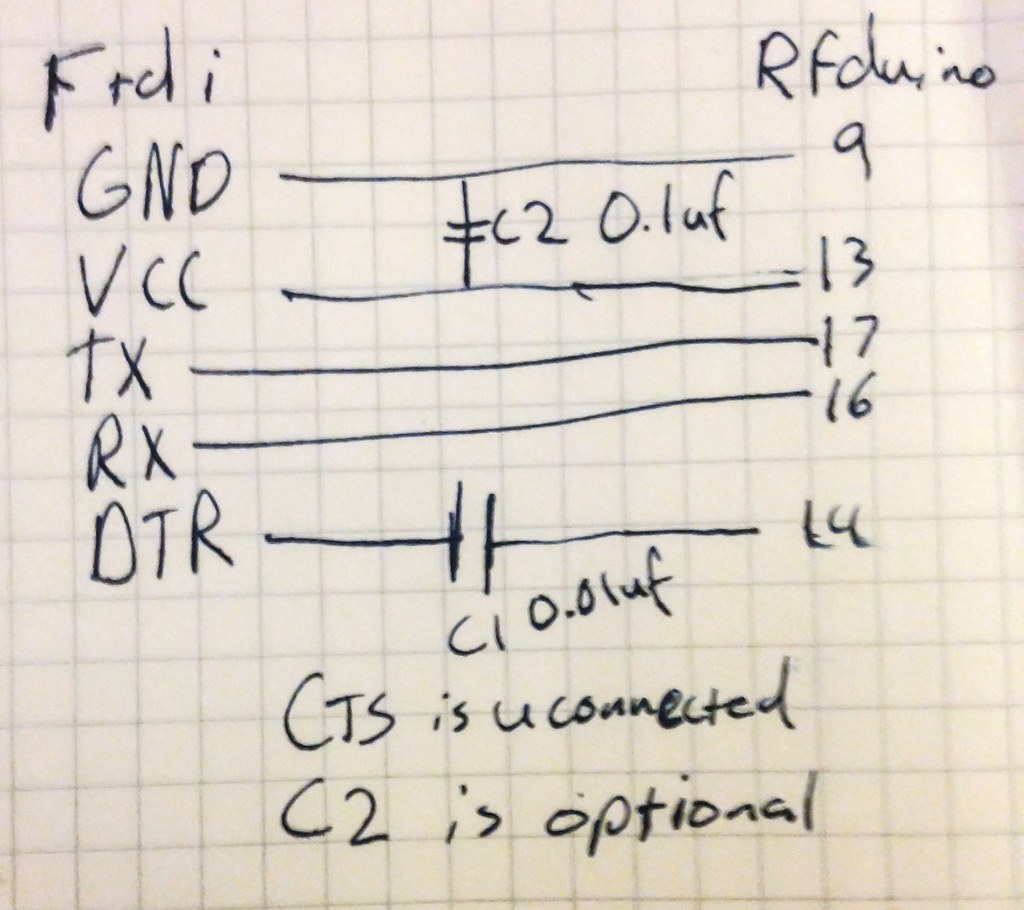
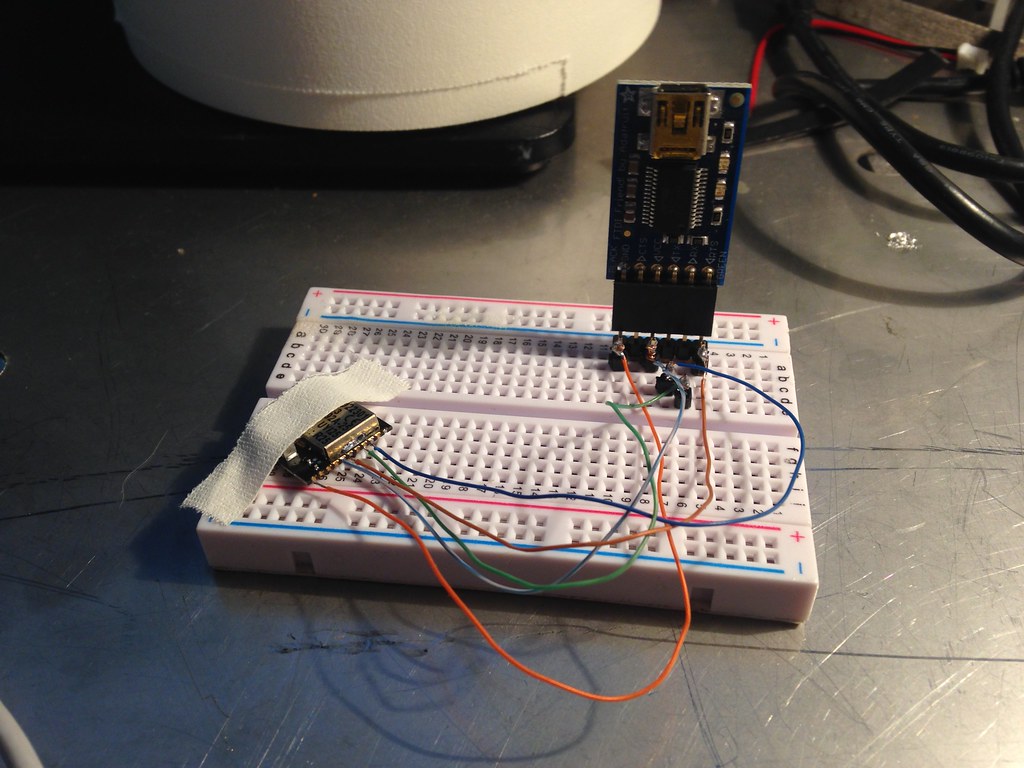
I derived most of the schematic from the datasheets for the parts involved, and then from some forum postings figured out the capacitor. It’s pretty simple once you get to the end point, but took me a while to get here. Recommended but not required is a filter capacitor wired in parrallel between VCC and Ground. On my breadboard currently, there’s also a pullup resistor from reset to Vcc, but that’s not required. I was trying to troubleshoot… anyway. Protip: Command-u is not the same as Command-shift-u.
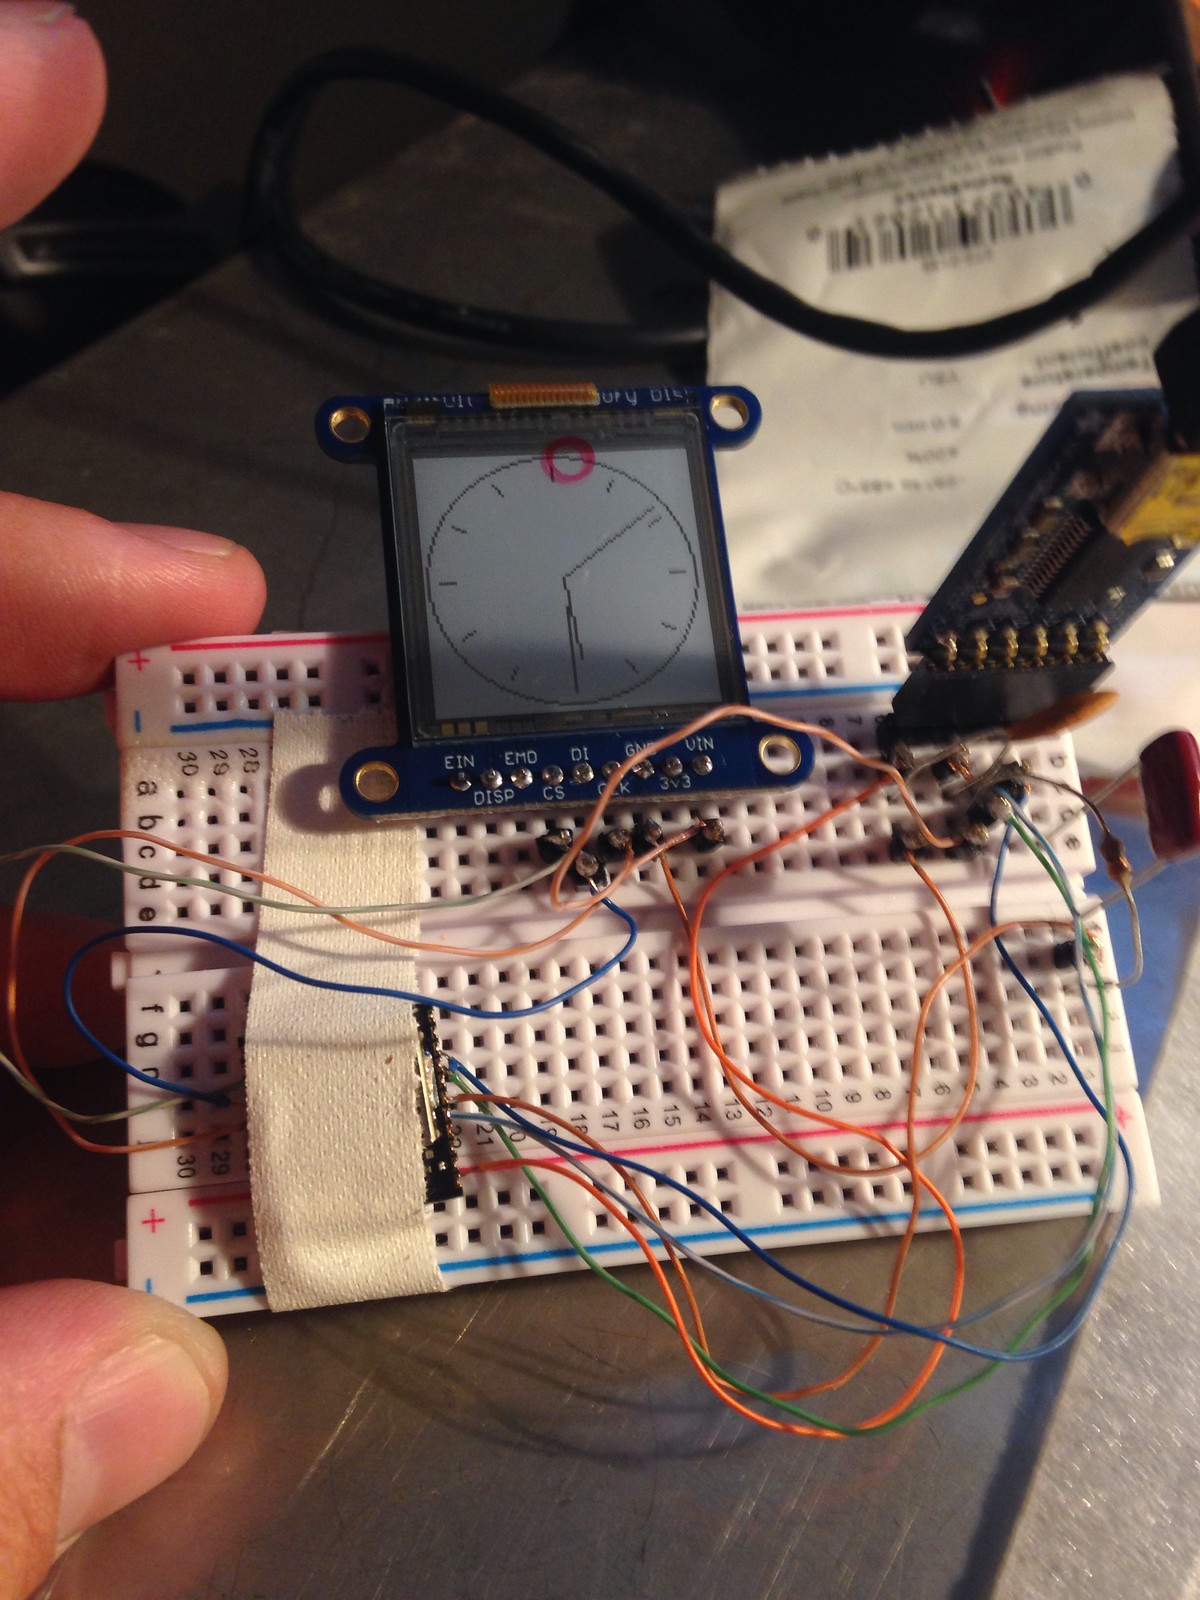
You could replicate the above with any of the FTDI programmers out there; sparkfun sells one, and there are clones all over. Just make sure it exposes the DTR line, and you’re set. One last photo: this is the current setup, with filter caps and a sneak peek at the display of the watch I’m working towards. You can see what loook like three hands; the one pointing to 12 is actually a bug in the redraw code. We’ll pretend it’s a second hand.
Posted by Matt on 2014-06-04 15:58:19 +0000